I have a little flat bread obsession at the moment. It all started with me digging out this recipe from the back of my recipe folder a couple weeks ago. I don't even know where the original recipe came from but I've done some tweaking along the way. This recipe is a hit in our house, particularly the garlic variation. If you really dislike the taste of chickpeas, this may not be for you but we really do love it! I took soooo many photos when I was whipping these little morsels of deliciousness up, so I apologise in advance for the crazy number of photos.
I started with sifting the chickpea flour. It often has a whole lot of lumps in it, so I use the back of a spoon to break those up.
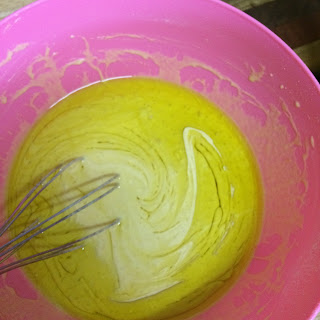
I add in the water and whisk, whisk, whisk until there are no lumps left.
Then I add in the oil and whisk some more!
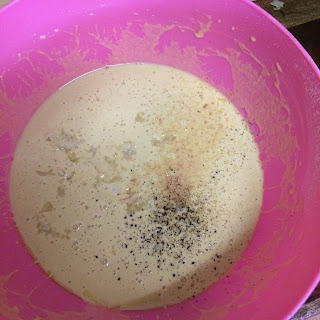
Now is the creative part. I add any fancy-pants flavourings I want to add. The favourite in our house is salt, pepper and fresh garlic.
I mix that all up gently, no whisking this time. Then I cover it with a tea towel and let it sit on the bench for a minimum of 30 minutes. Sometimes I make it up in the morning to use that night. The longer it's left, the lighter and fluffier the end result.
Ta-Da! This is what the mixture looks like after sitting on the bench for 4 hours. There is a bubbly layer on the top that I just whisk right back into the main mix.
I heat up a skillet/frypan (whatever you call yours). I prefer not to use non-stick pans but for this I find non-stick saves me the headache of having to avoid sticking in my stainless steel pans. Every recipe I have ever seen says to use oil but I actually cook mine in a dry pan! Whichever you choose is up to you.
At this point I turn around and see the Miss M had poured a whole lot of mixture on the floor and is dipping her fingers in and eating it! So instead of making 6 flat bread we only ended up with 5.
When the bubbles forming on the top of the flat-bread start to pop it's time to flip it. I cook until browned and then transfer it into the oven set on the lowest temperature possible to keep them warm. Alternatively, you can pile on a plate and cover with a tea towel. Then keep on following that process of cooking each one until you have about 6 yummy chickpea flat bread (or in my case 5!). We served ours with lamb meatballs and salad.
Ingredients
2 cups toasted chickpea flour (besan)
1 1/2 cups water
3 tablespoons oil (we used olive oil)
Salt and pepper to taste
Method
2. Add oil, salt and pepper. Whisk.
3. Cover with a tea towel and set aside for anywhere between 30 minutes and 12 hours. The longer you leave it the fluffier your flat bread will be.
4. Heat small frying pan/skillet on a medium high heat**. Once hot, pour in enough batter for one flat bread.
5. Cook until the top is no longer runny, flip and then cook for another 1 - 2 minutes.
6. Repeat steps 4 and 5 with remaining batter, Serve.
Variations
- Add 2 - 3 cloves or garlic at step 2 for a garlic version.
- After cooking use it like a pizza base! Lightly top with tomato sauce (or another safe sauce) and your regular pizza toppings.
** You can use a little oil in the pan. I have found coconut, grape seed or avocado oils work best. Olive oil made the flat bread stick to the pan.
Happy Cooking!
Jasmine
Happy Cooking!
Jasmine


No comments:
Post a Comment